How did I deal with…?

Skinning a Whole Human Body Using Maya Muscle

The goal of this exercise is to test the Maya Muscle tool. Here you can see a before/after image showing the muscles at work, including skin deformations and additional Visual Effects (nHair and nCloth):

Muscles shoulder front left Muscles shoulder front left
Muscles shoulder front left.

The solution I'm developing consists of:

Attaching muscles to joints

This is a basic example of the Muscle tool attaching to an arbitrary joint:

As you can see, the muscle attaches in 2 places, adding locators, creating a NURBS Surface, and simulating them as they squash and stretch, following the anchors on the rotating joints.

Influence objects

This are the polygonal models I'm using for the clavicles as influence objects:

Clavicles as influence objects Clavicles as influence objects
Polygonal meshes repurposed as influence objects (clavicles) inside the Muscle system.

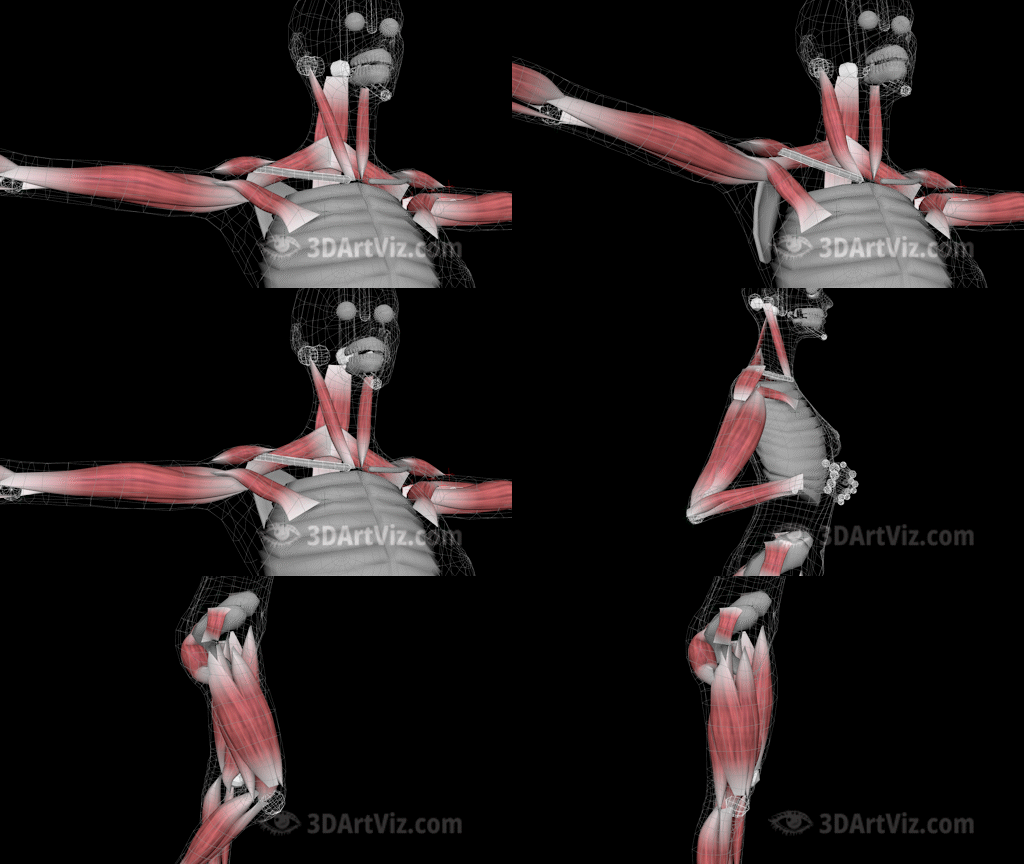
Here are some visuals from the 3 main muscle systems, namely, shoulders/Neck, arms, and legs:

Skinning poses using Maya Muscle Skinning poses using Maya Muscle
Solving deformations in 3 anatomic regions using Maya Muscle.

I'm adding an attribute to her breast, animating her breathing using a model of her ribs as influence object:

Breathing deforming breast with rigged influence object Breathing deforming breast with rigged influence object
Deforming her breast like breathing, using an influence object.

And another influence in the back of her shoulder to deform the skin when she moves her scapula:

Scapula influence object Scapula influence object
Using an influence object to mimic deformation from her scapula.

BlendShapes

These are some of the blendShapes I'm importing from ZBrush to deform her face and add facial expressions. Note that the only joints in her face are the ones controlling jaw and eyes:

Comparison facial expressions Comparison facial expressions
Comparison between facial expressions from ZBrush and composited version from Maya/Nuke.

And finally, this is what one part of the Shape Editor looks like for this character:

BlendShape editor BlendShape editor
Key animating, using the blendShape editor to link sculpted deformations and rig controls.

If you want to find out more about skinning, rigging and deformation workflows, click on these case studies:

Rigging human body
Rigging Human Body

Rigging a human body using animator friendly rigging in Maya. Torso, spine, FK/IK, neck, head, pose, fixed elbow, hand, reverse foot, independent pivots.

Rigging human head
Rigging Human Head

Rigging a human head with FK/IK minimal joints, creating a user interface, and combining blendShapes to match an expressions sheet.

Skinning facial expressions
Skinning Facial Expressions

Using skinning for facial expressions, through quad retopology, minimum Maya joints, importing and combining expressions sculpted in ZBrush.

Also, these links show more case studies about VFX and rigging:

Grooming human head
Grooming Human Head

Grooming a human head using XGen in Maya, linking geometry to descriptions, simulating, caching, applying shaders, rendering and compositing.

Maya Muscle for Skinning

Simulating Maya Muscle on a rigged human character, using them as deformers on skinning and letting it drive Maya Nucleus nHair and nCloth.

Simulating clothes with nCloth
Simulating Clothes

Simulating clothes using nCloth in Maya. Mesh with motion capture drives dress & necklace. Cached shirt simulation drives a vest.

Visual effects workflow
VFX Workflow

Letting animated characters drive VFX using Maya Nucleus, including flexible cables, molten metal, smoke, sparks, and optical effects.

Discover 3D Skills