How did I deal with…
Developing a 3D Production Pipeline for Render Time
The goal of this project is to make a 1 scene short film, featuring 1 character. The solution I'm developing consists of making a bipedal character animation with additional simulations. Here you can see the finished short film:
I'm answering the organization demands by dividing the whole project in three sub steps:
I'm using a standard Project Management application (MS Project) to get a hold of the time, adding value by investing resources in every task, and setting deadlines from the start.
1. Pre‑production
I'm developing the look and feel of character and environment at the pre‑production Stage. This is the moment to get creative and make experiments. All solutions take place at this stage, no U Turns during Production.
Here are some task examples of pre‑production in a typical 3D Pipeline:
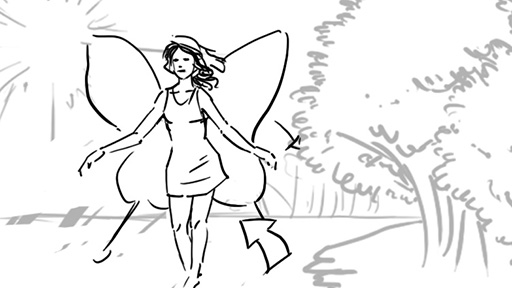
Storyboard and animatic
Self explanatory, click on the arrows to advance through the vignettes.
And here is the animatic, with final timing:


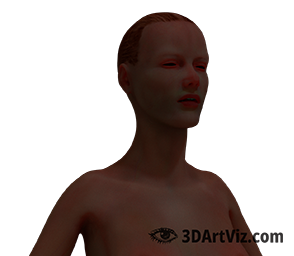
Facial expressions
Showing a selection of expressions from a more extensive Expressions Sheet. The solution here is going beyond the basic briefing by adding more facial expressions than the minimum and prepping the character for an escalated version of the short film:


Turnaround
Showing the posed character in a virtual turntable:


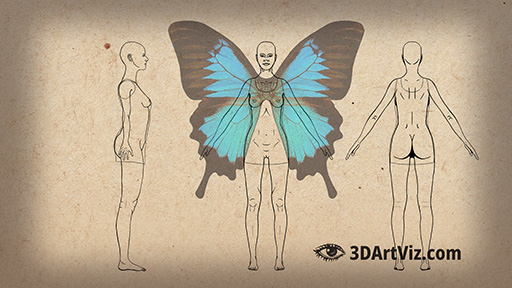
Orthographic views
Making the character usable for 3D modelers by offering a set of orthographic views.


Concept art
Setting up tones, conveying lighting information, and narrative elements:


Once I can count on a finished pre‑production, I finally know what my characters, environments and props are going to look like, what dimensions they are going to have, and what steps I have to take to get the job done.
Only now I am in the position to move into production, where the required investments in money and time become massive: This is the point of no return.
2. Production
These are the most common tasks inside a production pipeline for 3D projects in render time. This is true as well for characters as for environments & props. The Digital Content Creation (DCC) pipeline is the same for real and render time:
Modeling Character and Environment
Sculpting
Sculpting from ZSpheres in ZBrush, Unified Skin, brushing basic details only, focusing on getting proportions right:


Retopology
Manual Retopology on a decimated version of the character's body, in Maya using Quad Draw, focusing on edge loops and prepping the mesh for animation:


Procedural modeling
This is an example of procedural retopology from another project (I'm not using procedural modeling in this project), using ZRemesher inside ZBrush:


This link takes you to this project's page:
For Sculpting and Retopology, click on the following case studies:
I'm using VFX to populate the background, making the environment's modeling pretty simple:


If you want to find out more about modeling environments and architecture, click on the following case study links:
Rigging the character
I'm rigging and animating the character to export a cached mesh version using Alembic. I have too much to show about rigging, so I'm just mentioning this as a part of the pipeline.
If you want to know more about rigging and skinning, click on the following case studies:
Here you can see some of the minimal functionalities of a rigged human body:
Skinning
I'm using Maya Muscle to drive the model's deformations, using the NURBS Surfaces as influences on the mesh:


Using skinning for facial expressions
I am rigging her face using a simple blendShape method, importing facial expressions sculpted in ZBrush. Her only expression in this short film is a smile.
As mentioned before (see expressions sheet in pre-production), I am including some additional facial expressions, in case I have to reuse this rig in a bigger production pipeline scale.


If you want to know more about Maya Muscle and Skinning, click on these case studies:
Once I test my rigging and deformations, I am animating my character, first blocking out the main translations, and later adding some subtle variations, like:
- Stretching her legs before landing
- Lowering down the arms
- Opening her eyes, looking at the camera, and smiling
Visual Effects
My solution for flowers, plants, and bugs flying towards her, at the beginning of the short film, consists of simulating 4 tunneled force fields, swirling particles in her direction, and using an animated Alembic low‑res version of her body as attractor and collider:


I am retouching photographs, adding some procedural dust to the particles inside the tunnels, and simulating them using nParticles.
I'm using Paint Effects for vegetation, including wind simulations:


I am using Nucleus Tools, namely nHair and nCloth, to solve dynamics on her hair, dress and wings:


If you want to find out more about VFX, check out these case study links:
Rendering the short film
I am dividing the render fields of my short film into foreground, middle‑ground and Background.
- Foreground includes the character and the pampas grass waving in the wind
- Middle‑ground includes water, ground, bigger trees, etc., and
- Background includes sun, mist, water in the back and far trees, etc. I'm using a 2D cardboard style Paint Effects for the farthest trees.
I'm rendering for compositing. I know from experience that they are going to need the following buffers (I'm using Mental Ray) for every element in the fields:
- Direct lighting
- Indirect lighting
- Diffuse
- Reflections
- Speculars
- Refraction (transparency)
- Subsurface scattering (SSS) / translucency
- Volumetric lights
- Depth of field
- Motion blur
Here you can see some of the passes already composited:


For lighting, I'm adding a High Dynamic Range Image (HDRI) for general lighting, a directional light to reinforce sunlight, and a spotlight to light up the speculars in her eyes.
Texturing
For materials and textures, I'm using specific shaders, depending on the properties of the asset. Here are some of the textures I am using for her body, applying on a PBR Material later in Arnold:


If you want to know more about texturing a character or building up a PBR material, visit the following case studies:
Once my lighting, textures, and materials are ready, I'm rendering HDRI into Open EXR format file sequences, importing, and compositing them in Nuke.
3. Post‑production
I'm identifying compositing with post‑production in this project. A VFX Pipeline for live‑action‑footage is different than one for animation or real time. Some studios even understand post‑production as dialog and foley.
That being said, I have been using Nuke for years and its nodes‑based architecture and direct compatibility with Python, make it an irreplaceable tool for render artists. That's why I'm including Compositing as a part of the Rendering pipeline in the rest of this portfolio.
Here you can see the compositing phases in this short film:
Once the whole scene is composited, I can render a final, retouched version and edit it (in this case) in a program like Premiere Pro. From there, I can export the rendered film to any format or size.
If you want to know more about compositing and post‑production, check out this workflow‑breakdown link:
And that's the end of the 3 phases in 3D Production Pipeline for a render time animation short film.
If you want to know more about Management and pipeline development, click on the following case study links:


